Single-particle tutorial (EMPIAR-10025)
This tutorial shows how to convert raw movies from EMPIAR-10025 (T20S proteasome) into a ~3A resolution structure.
Total running time required to complete this tutorial: 45 min.
Pre-calculated results are available in the demo instance of nextPYP.
We first use the command line to download and decompress a tbz file containing a subset of 20 movies, the gain reference, and an initial model:
# cd to a location in the shared file system and run:

wget https://nextpyp.app/files/data/nextpyp_spr_tutorial.tbz
tar xvfz nextpyp_spr_tutorial.tbz
Open your browser and navigate to the url of your nextPYP instance (e.g., https://nextpyp.myorganization.org).
Step 1: Create a new project
Data processing runs are organized into projects. We will create a new project for this tutorial
The first time you login into
nextPYP, you should see an empty Dashboard:
Click on Create new project, give the project a name, and select Create
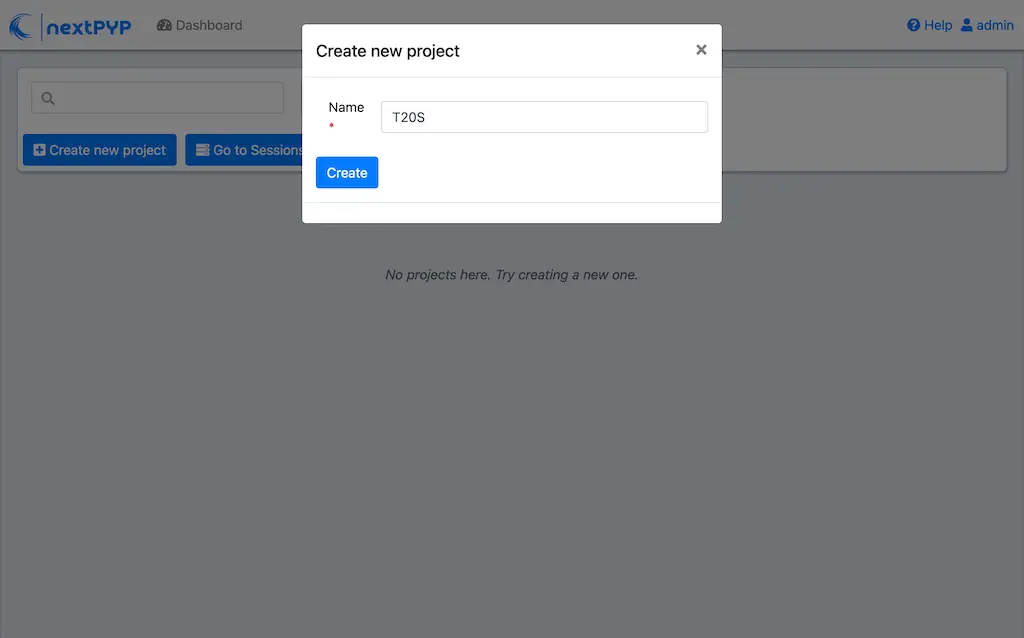
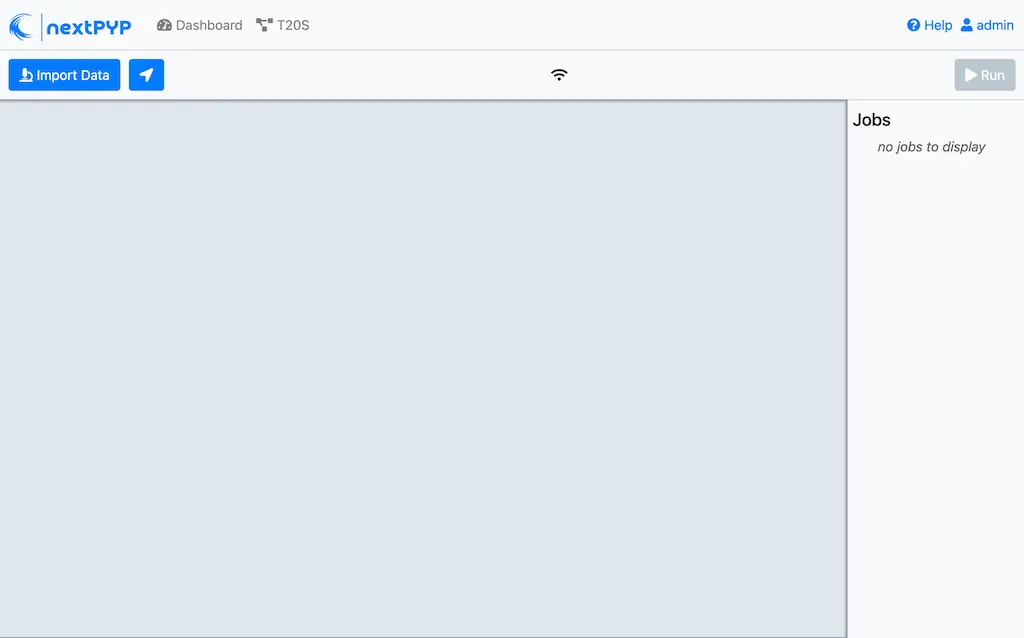
Select the new project from the Dashboard and click Open

The newly created project will be empty and a Jobs panel will appear on the right
Step 2: Import raw movies
Import the raw movies downloaded above ( <1 min)
Click Import Data and select Single Particle (from Raw Data)
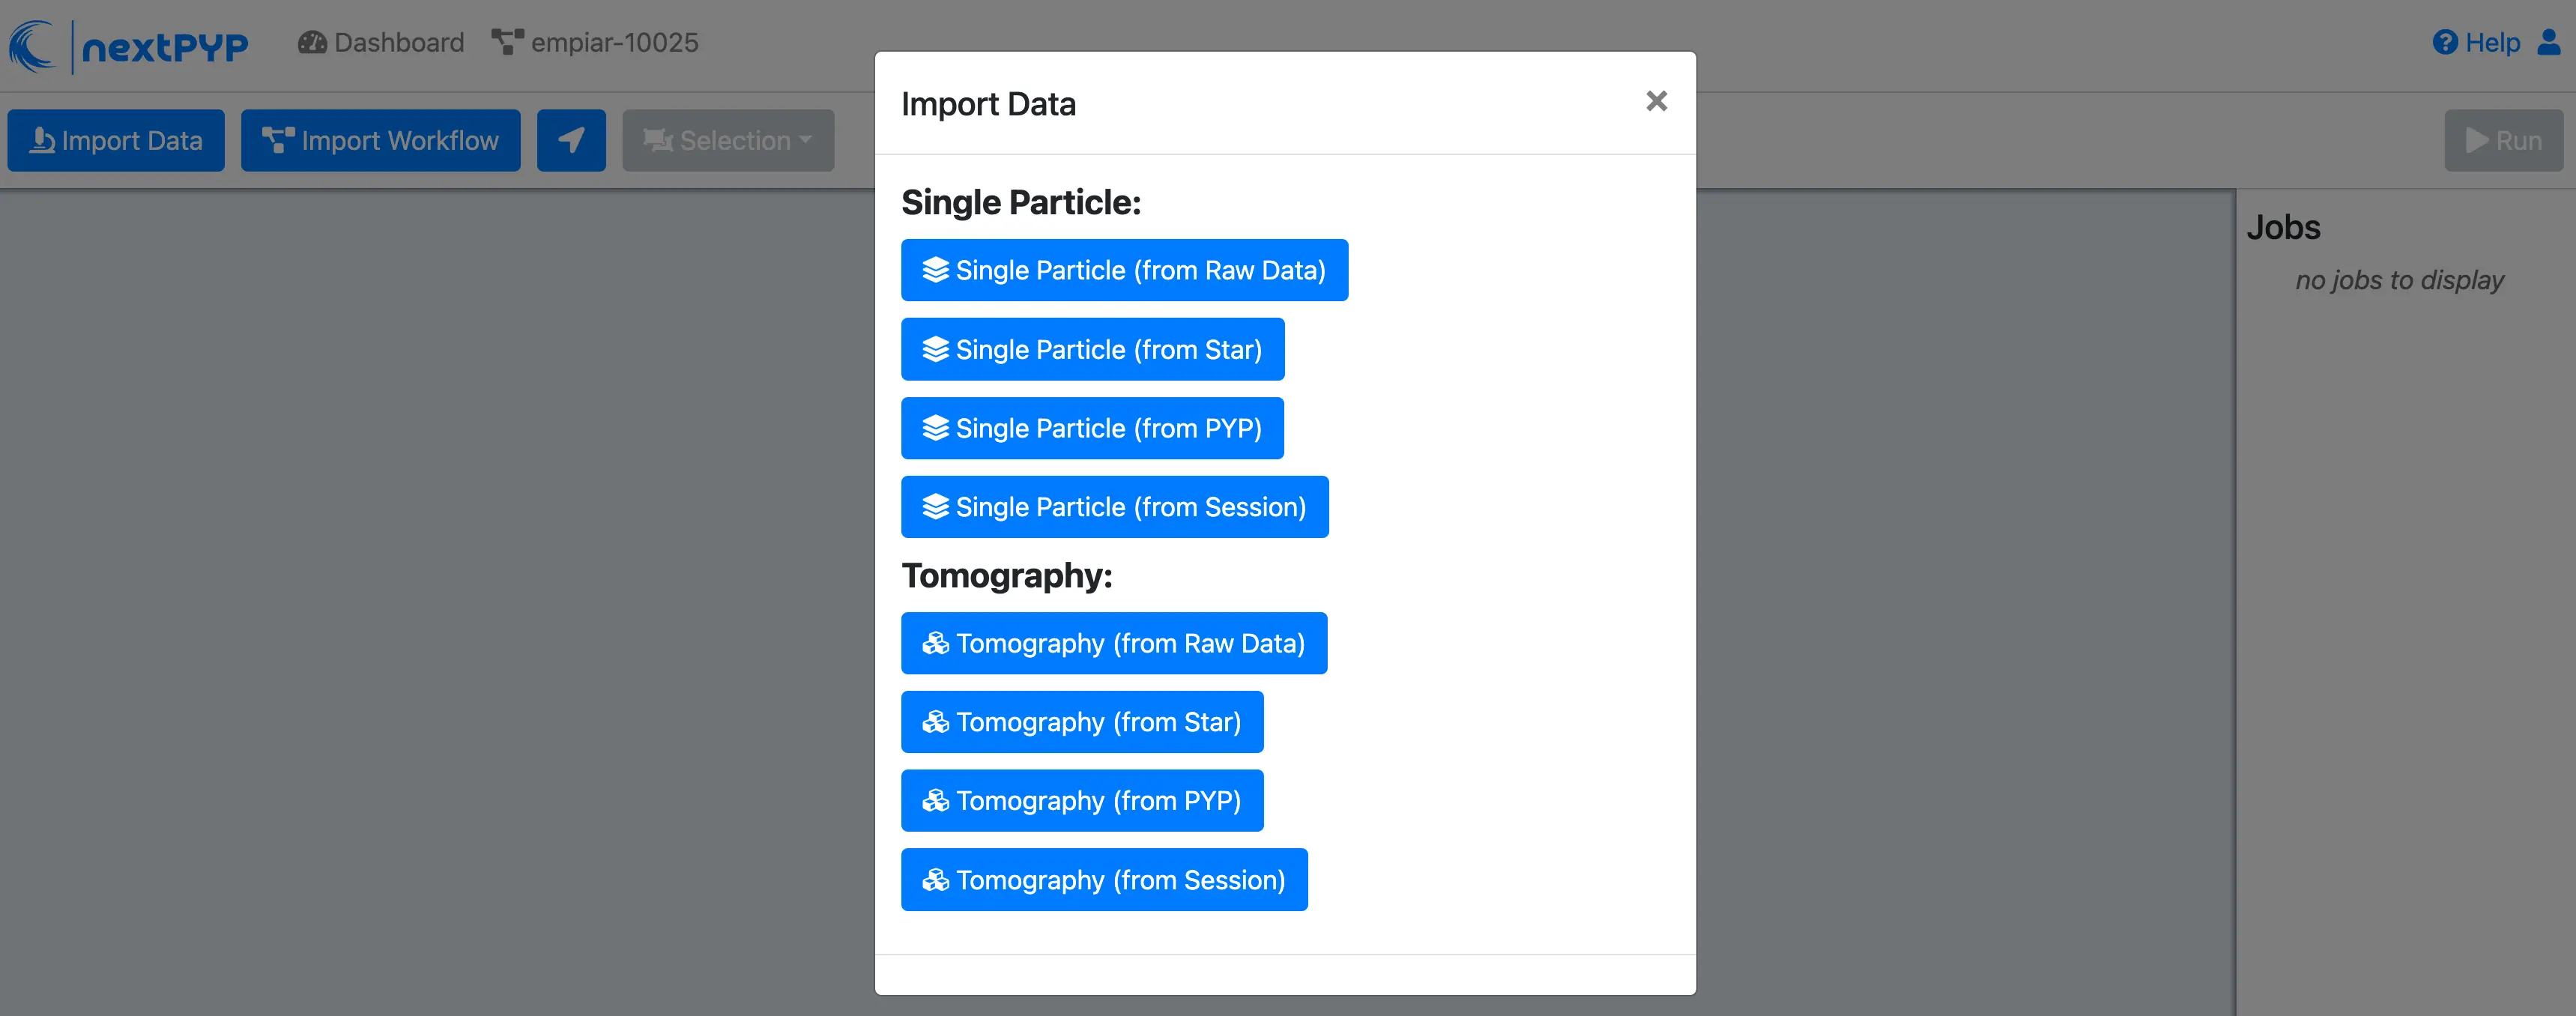
A form to enter parameters will appear:
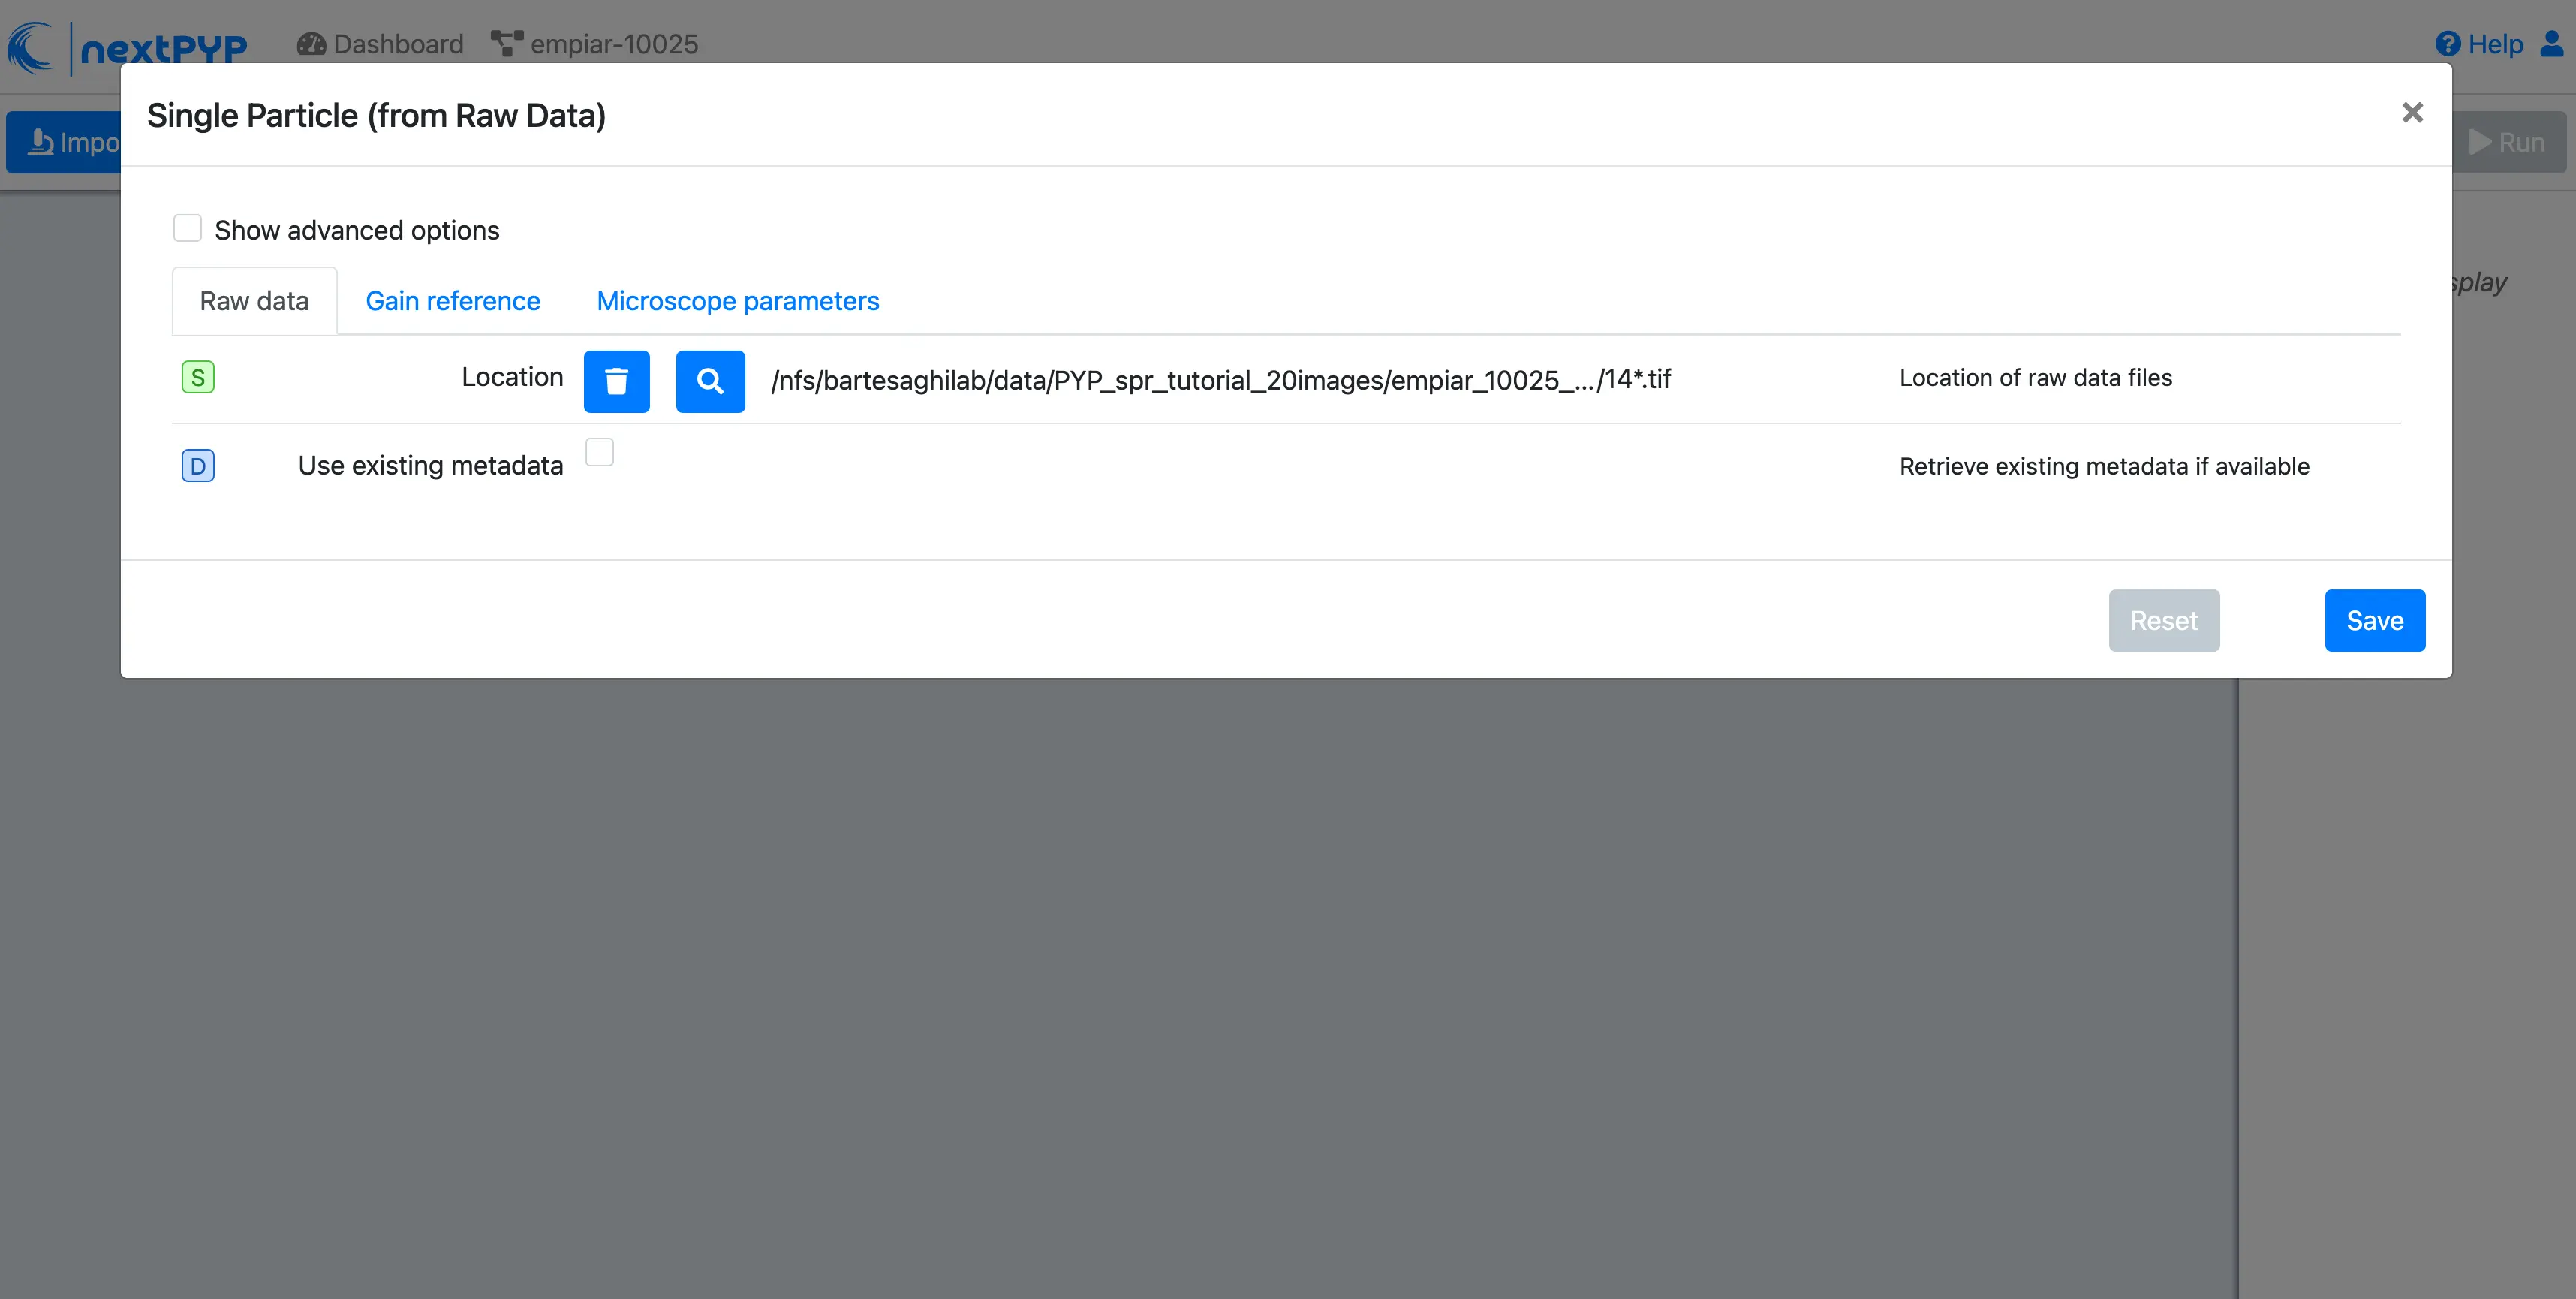
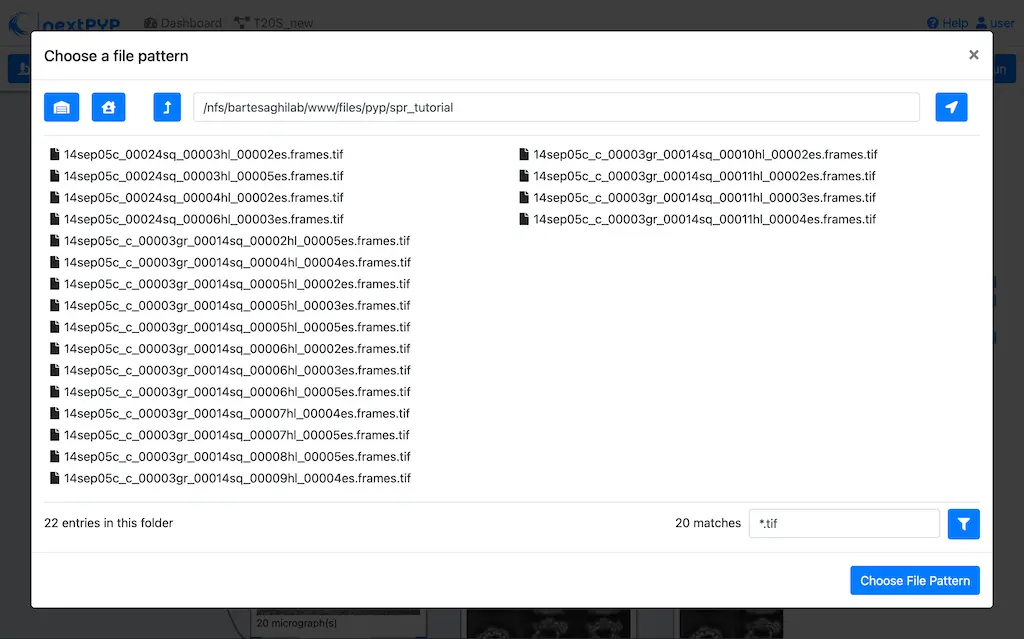
Go to the Raw data tab:
Set the
Locationof the raw data clicking on the icon and browsing to the directory where the you downloaded the raw dataType
14*.tifin the filter box (lower right) and click on the icon to verify your selection. 20 matches should be displayedClick Choose File Pattern
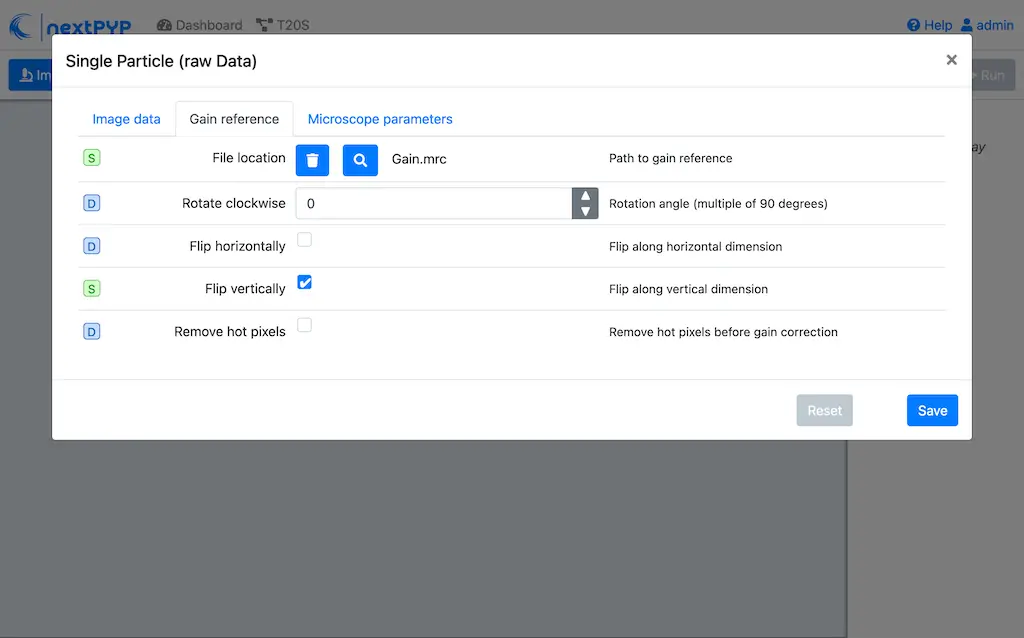
Click on the Gain reference tab
Set the
Locationof the gain reference by clicking the icon and navigating to the directory where you downloaded the data for the tutorial. Select the fileGain.mrcand click Choose FileCheck
Flip verticallyClick on the Microscope parameters tab
Set
Pixel size (A)to 0.66Set
Acceleration voltage (kV)to 300

Click Save and the new block will appear on the project page
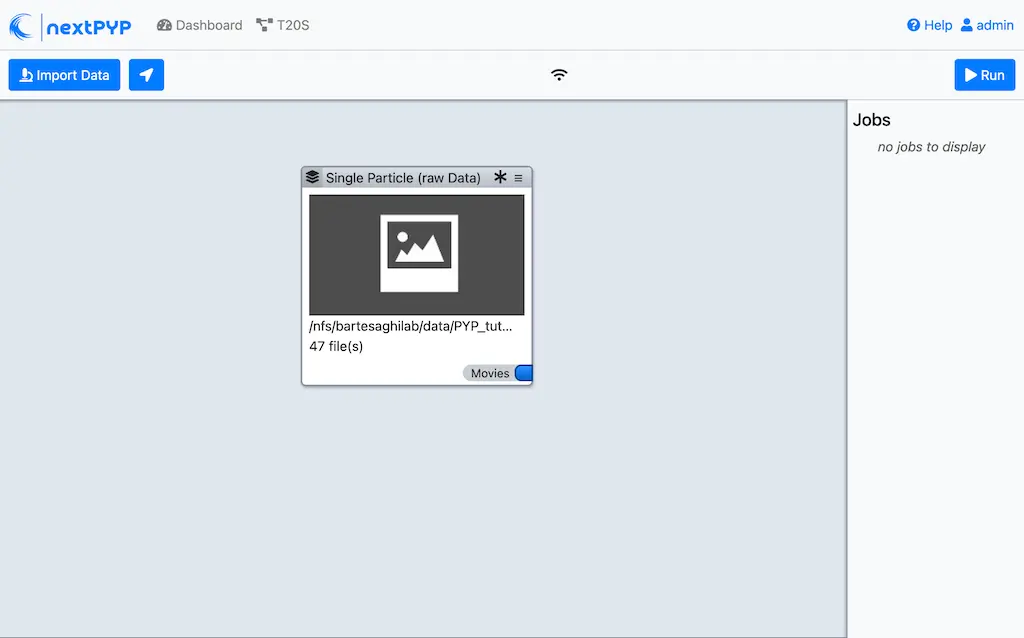
The block is in the modified state (indicated by the sign, top bar) and is ready to be executed
Clicking the button Run will show another dialog where you can select which blocks to run. Since there is only block available, simply click on Start Run for 1 block. This will launch a process that reads the first movie, applies the gain reference and displays a thumbnail inside the Single Particle (from Raw Data) block
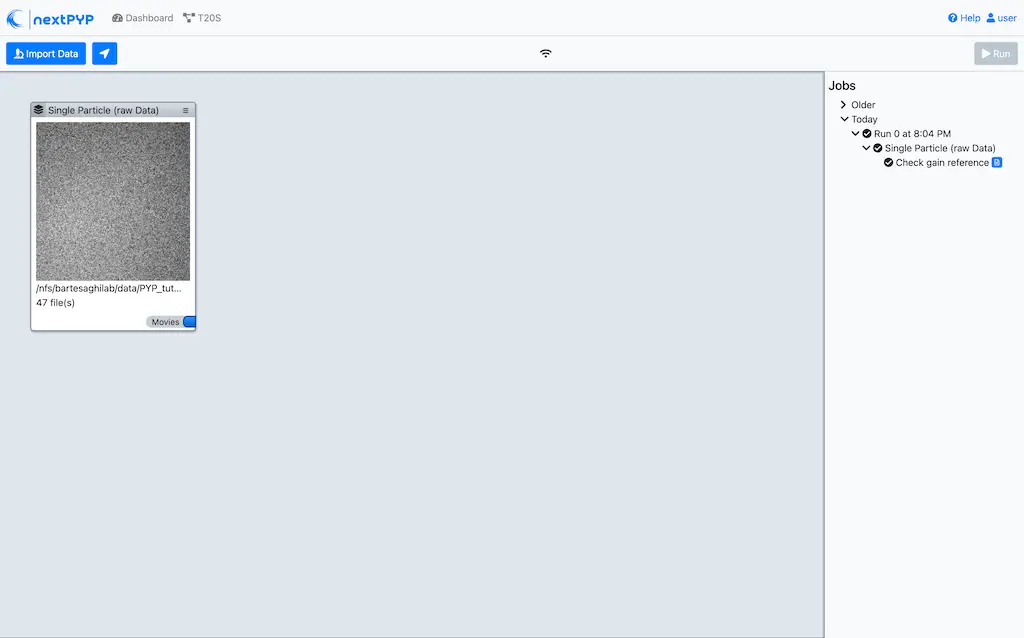
Tip
Click inside the Single Particle (from Raw Data) block to see a larger version of the image
Step 3: Pre-processing
Movie frame alignment, CTF estimation and particle picking ( 2 min)
Click on
Movies(output of Single Particle (from Raw Data) block) and select Pre-processing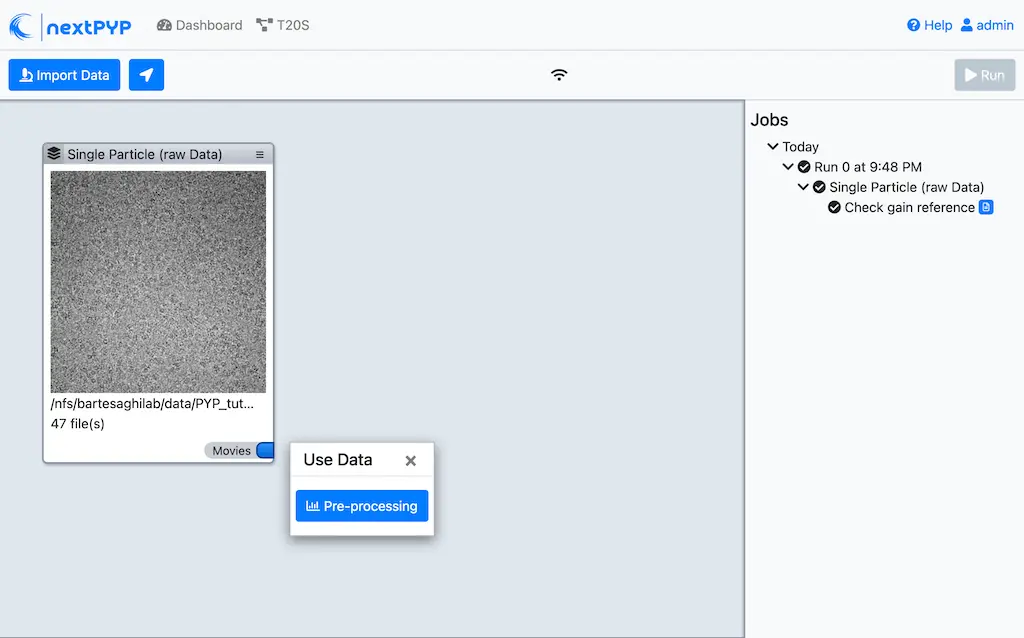
Go to the Particle detection tab:
Set
Particle radius (A)to 65Set
Detection methodto allSet
Min distance (pixels)to 40Click on the Resources tab
Set
Split, Threadsto 7Set other runtime parameters as needed (see Computing resources)
Click Save, Run, and Start Run for 1 block. You can monitor the status of the run using the Jobs panel
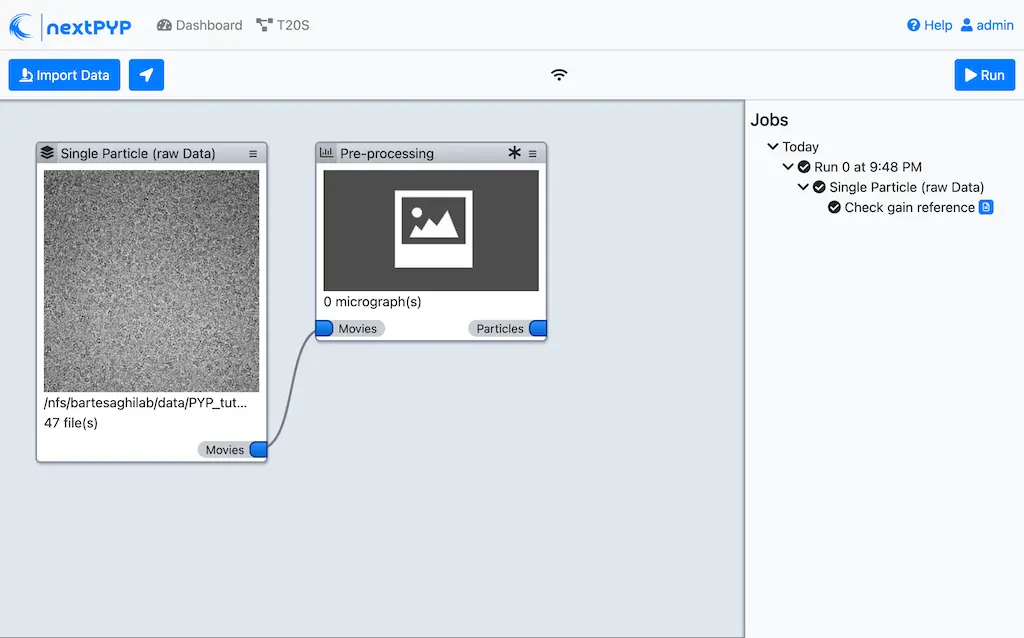
Click inside the Pre-processing block to inspect the results (you don’t need to wait until processing is done to do this). Results will be grouped into tabs:

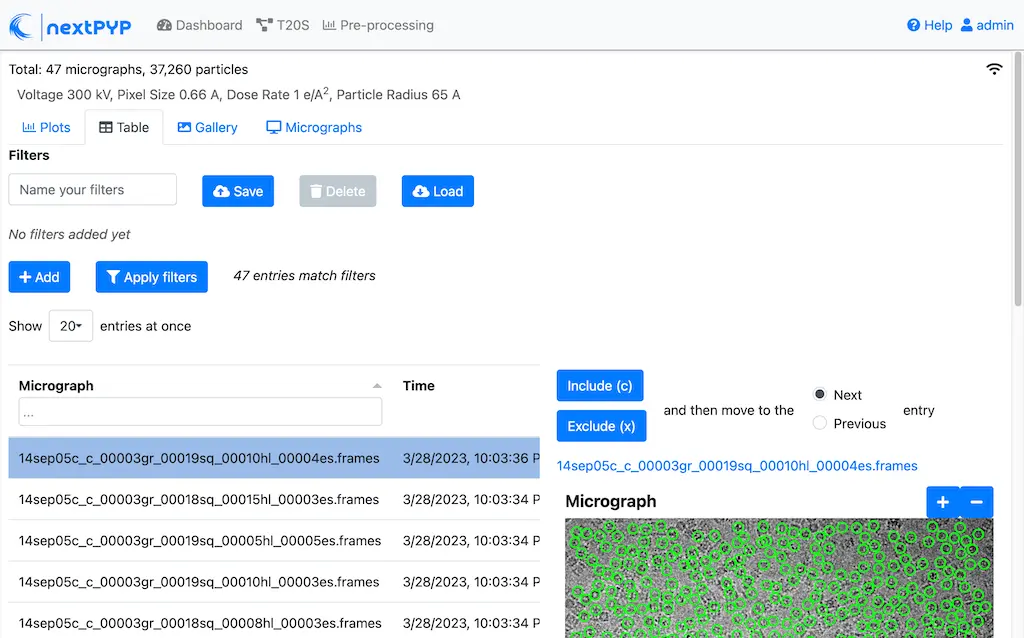

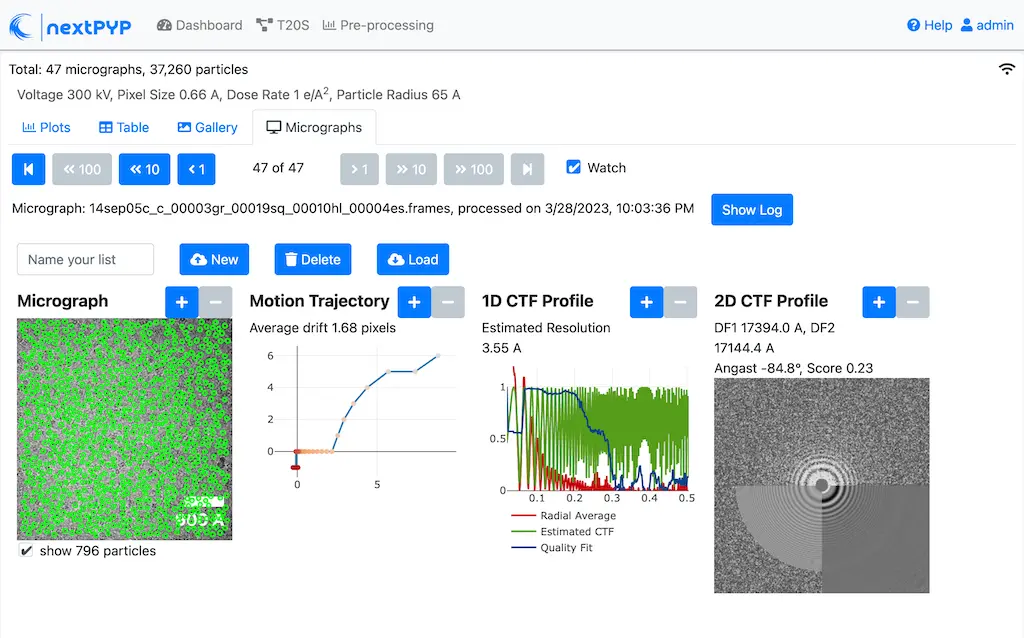
Data processing details (particle picking, drift trajectory, CTF profile, power spectrum)
Tip
While on the Micrographs tab, use the navigation bar at the top of the page to look at the results for other micrographs
Step 4: Reference-based refinement
Reference-based particle alignment ( 3 min)
Click on
Particles(output of Pre-processing block) and select Particle refinement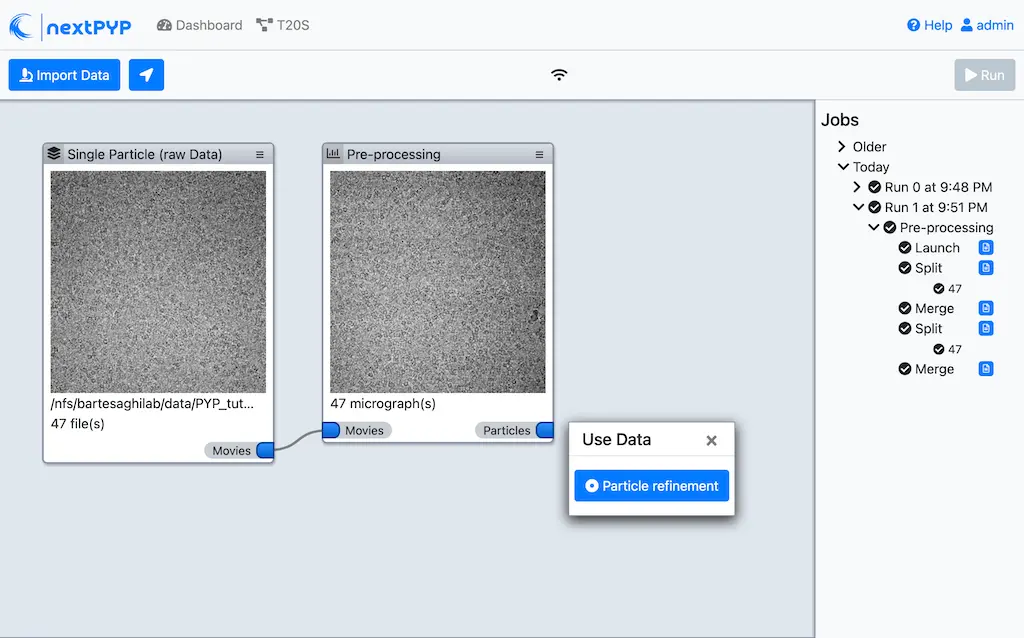
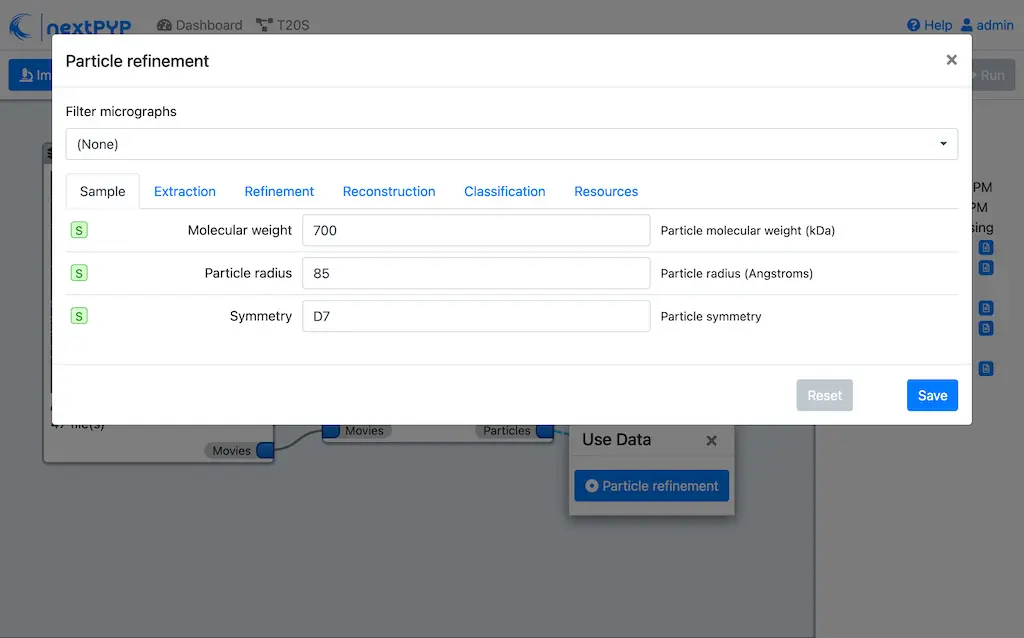
Go to the Sample tab:
Set
Molecular weight (kDa)to 700Set
Particle radius (A)to 80Set
Symmetryto D7Click on the Extraction tab
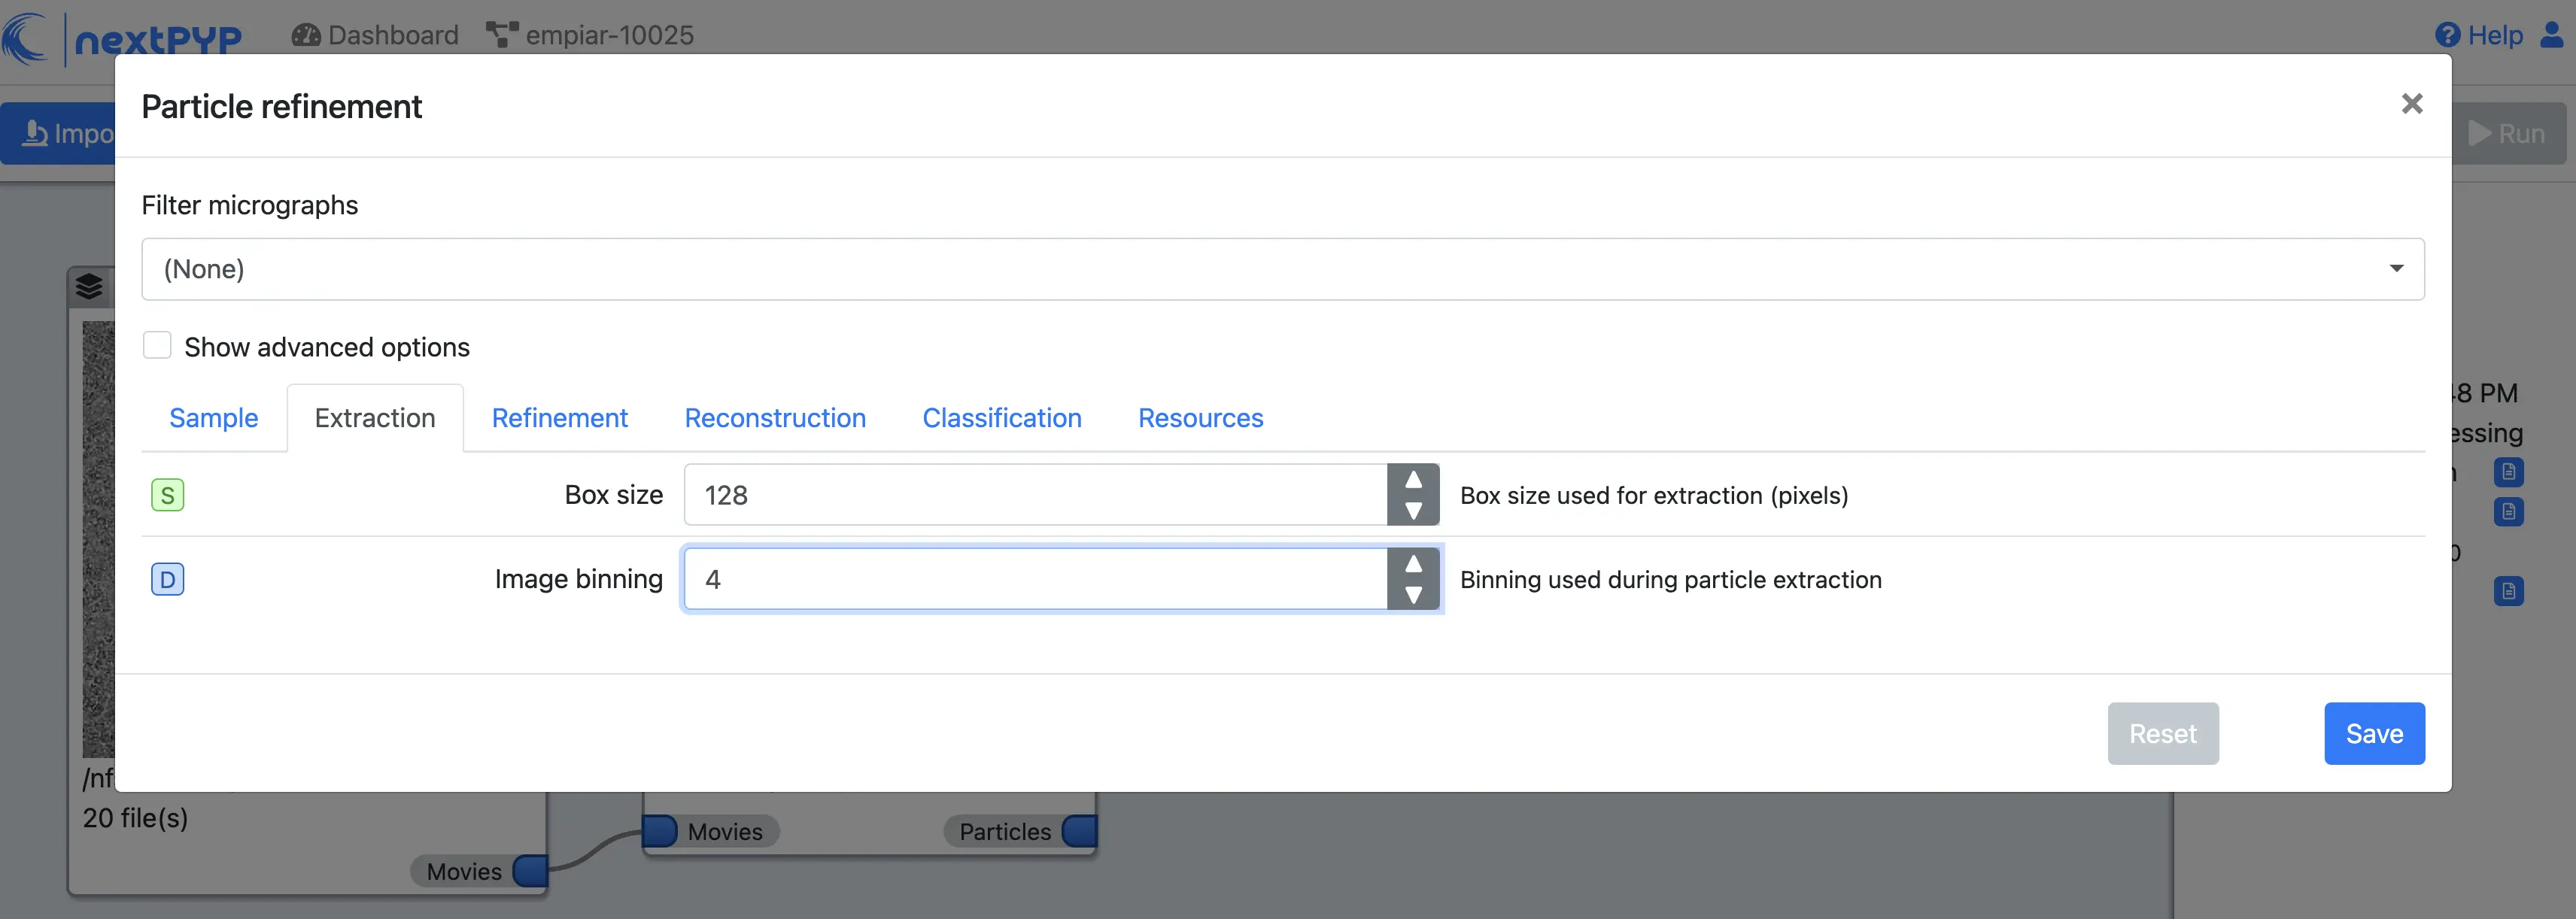
Set
Box size (pixels)to 128Set
Image binningto 4Click on the Refinement tab
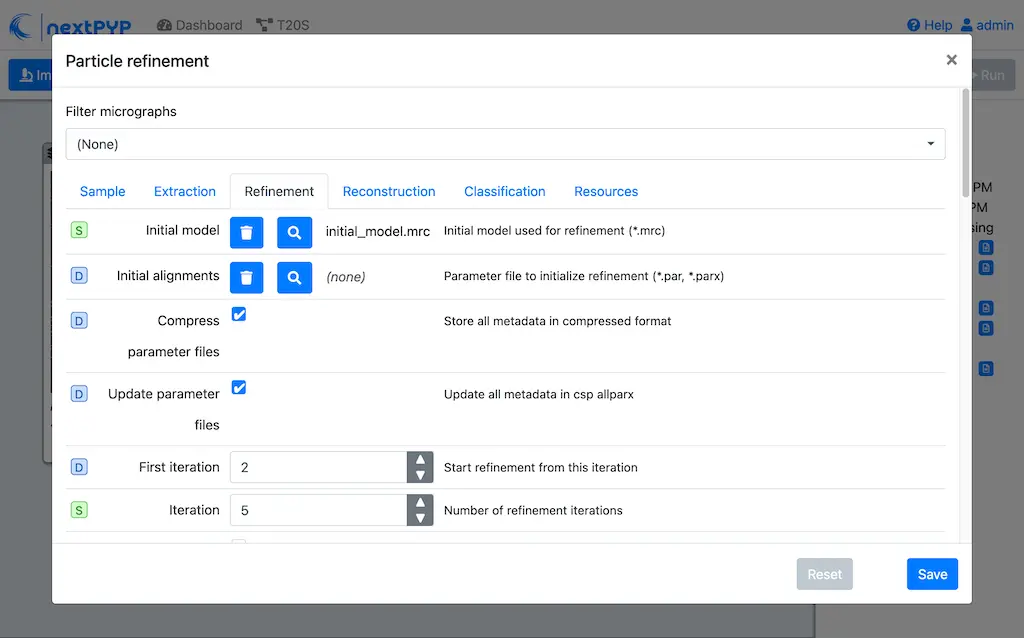
Set the location of the
Initial modelby clicking on the icon , navigating to the folder where you downloaded the data for the tutorial, selecting the file EMPIAR-10025_init_ref.mrc, and clicking Choose FileSet
Max resolution (A)to 8:7:6Check
Use signed correlationSet
Last iterationto 5Uncheck
Skip refinementCheck
Use alignment priorsClick on the Reconstruction tab
Set
Fraction of particlesto 0
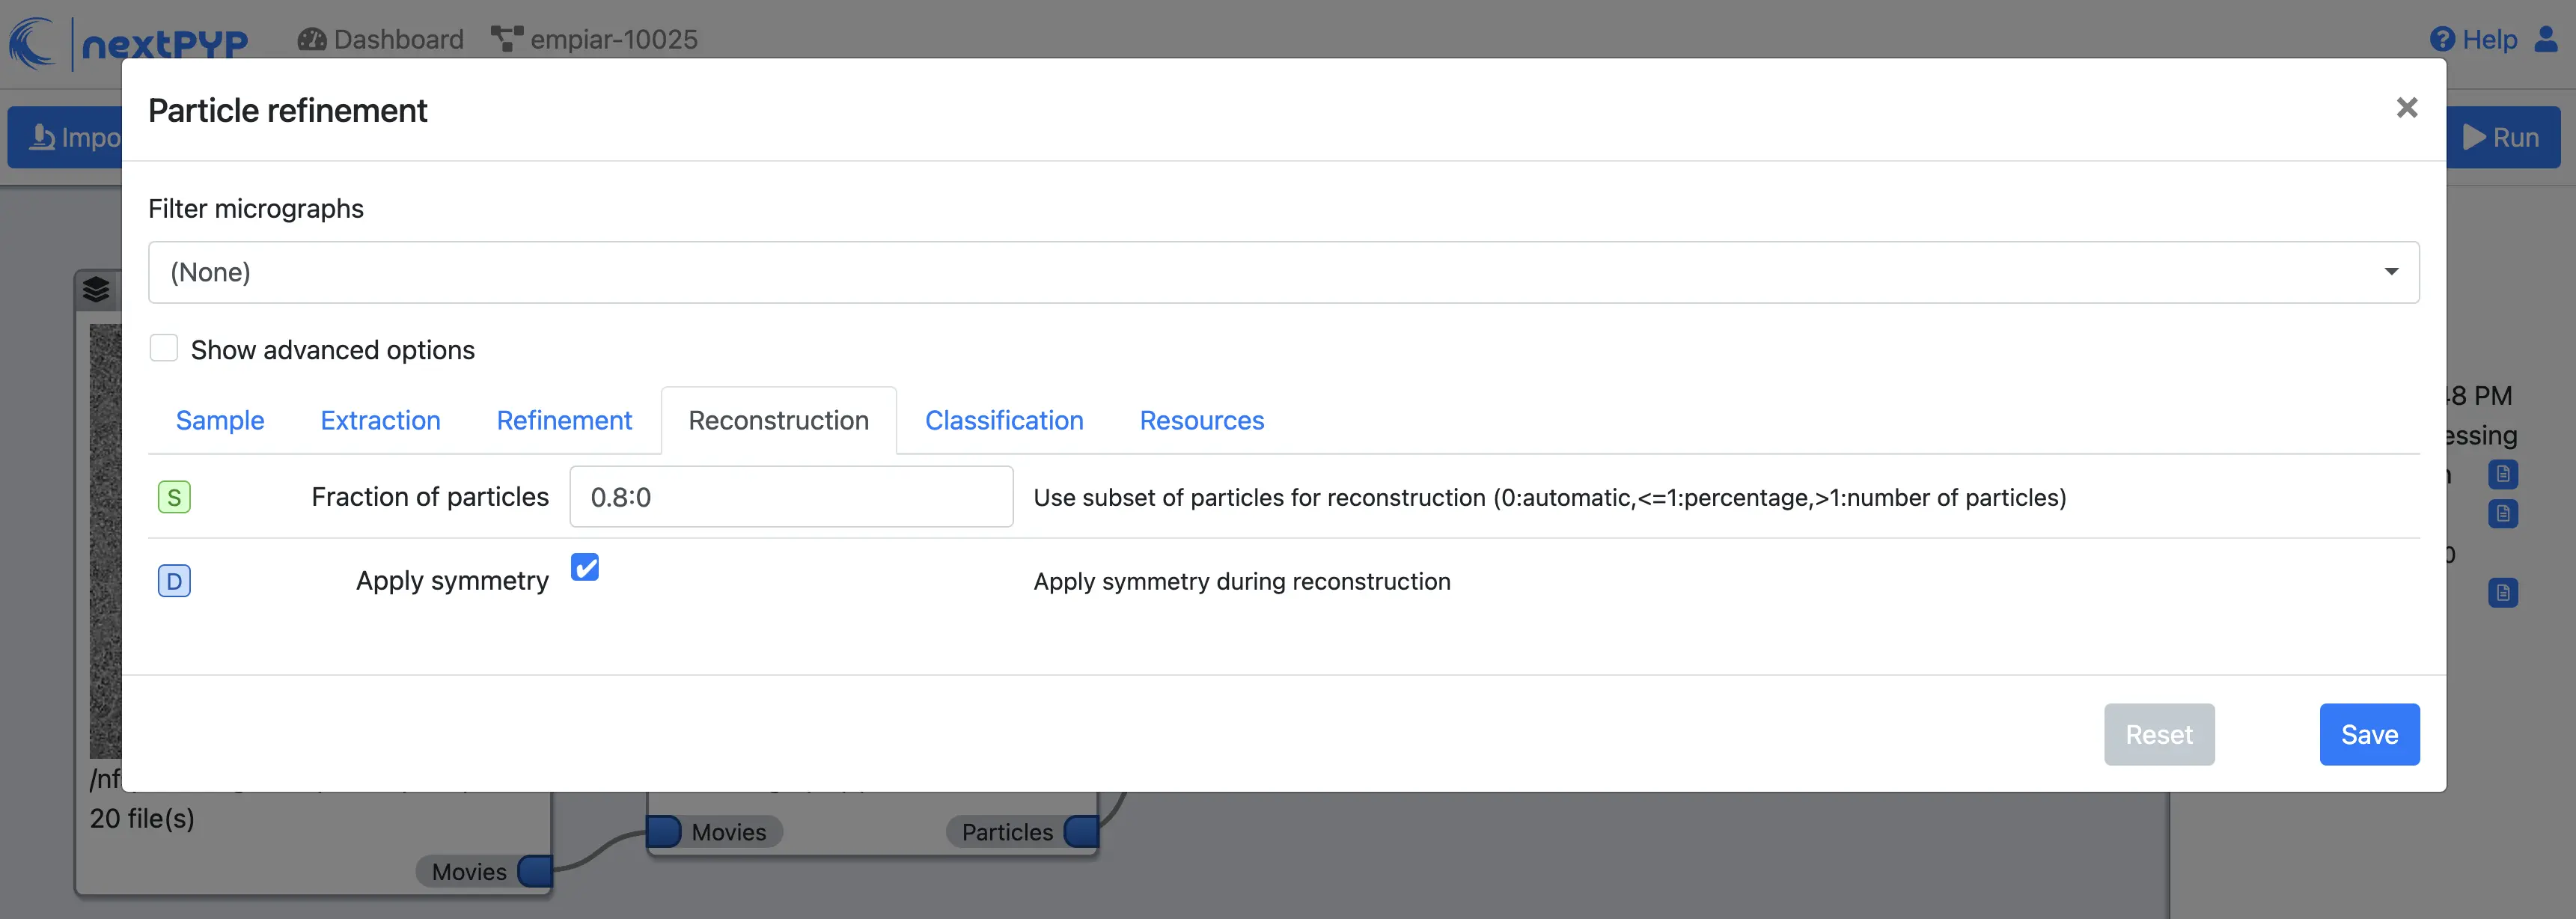
Click Save, Run, and Start Run for 1 block
The new block will appear on the Dashboard and a thumbnail will be displayed inside after the run is finished
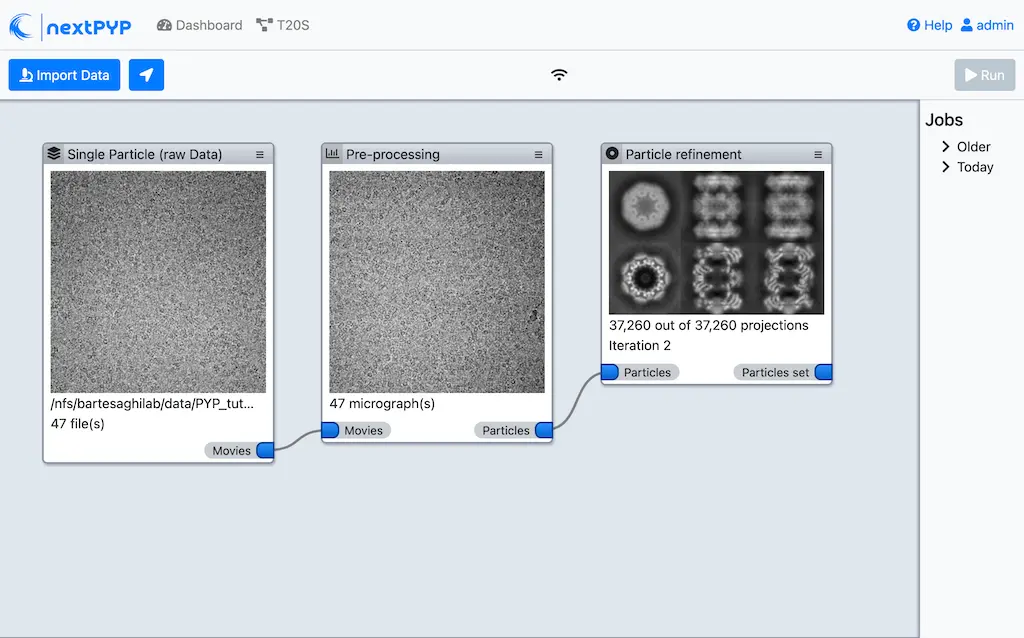
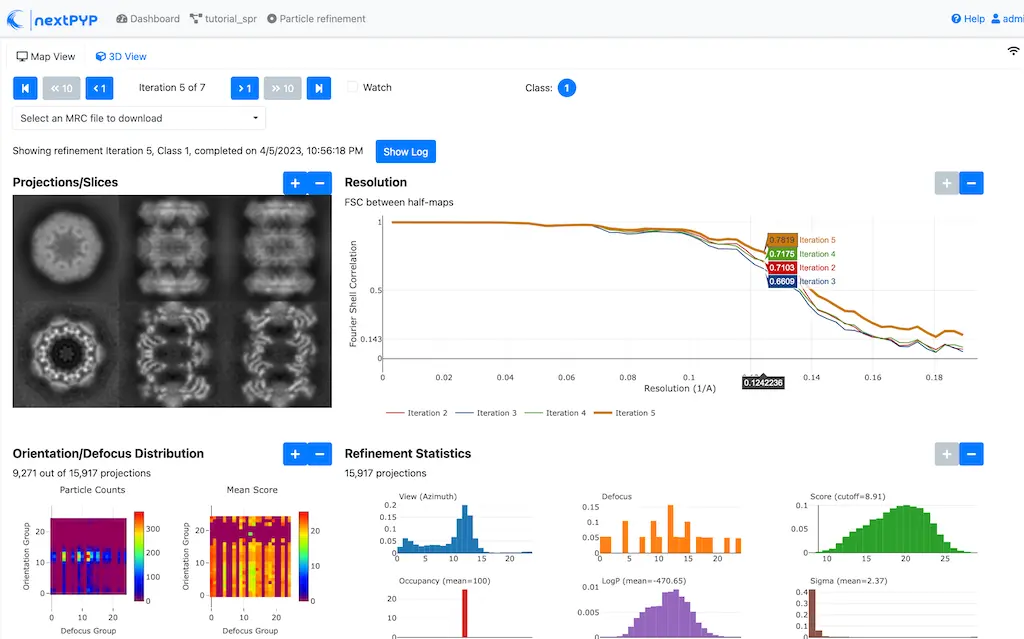
This process executes four rounds of global orientation search (iterations 2-5). The fraction of good particles at each iteration will be determined automatically (
Fraction of particles= 0) and used for reconstructionClick inside the Pre-processing block to inspect the results:
Step 5: Filter bad particles
Identify particles with low alignment scores ( 1 min)
Click on
Particles(output of Particle refinement block) and select Particle filtering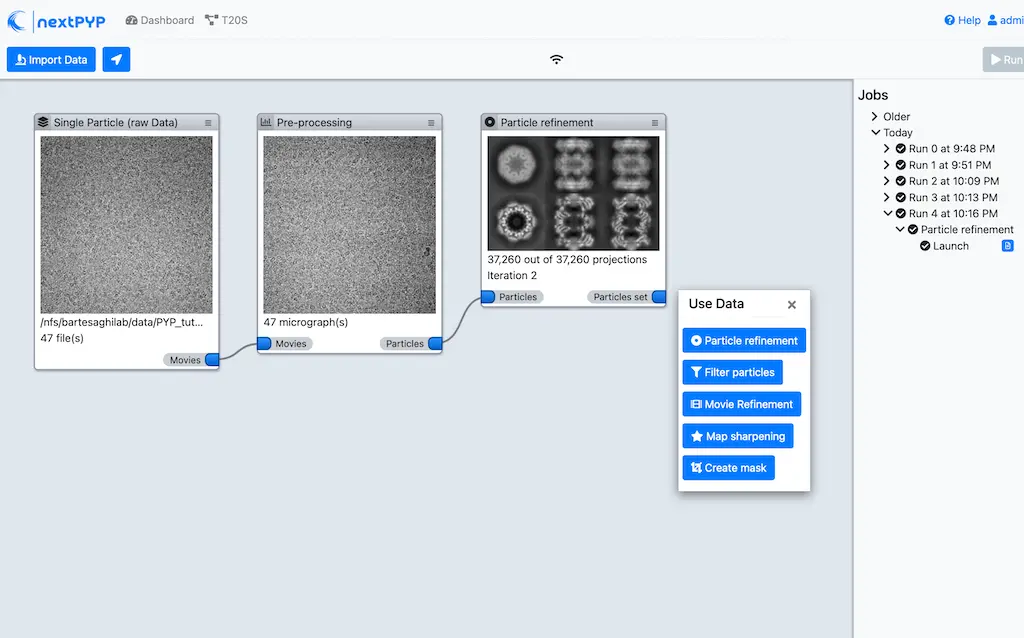
Go to the Particle filtering tab:
Check
Automatic score thresholdSet
Min distance between particles (A)to 20Select the
Input parameter fileby clicking on the icon and selecting the file sp-coarse-refinement-*_r01_05.par.bz2Check
Generate reconstruction after filteringCheck
Permanently remove particlesClick on the Refinement tab
Select the
Initial modelby clicking on the icon and selecting the file sp-coarse-refinement-*_r01_05.mrc
Click Save, Run, and Start Run for 1 block to execute particle cleaning and produce a reconstruction with only the clean particles
Click inside the Particle filtering block to look at the reconstruction after cleaning:
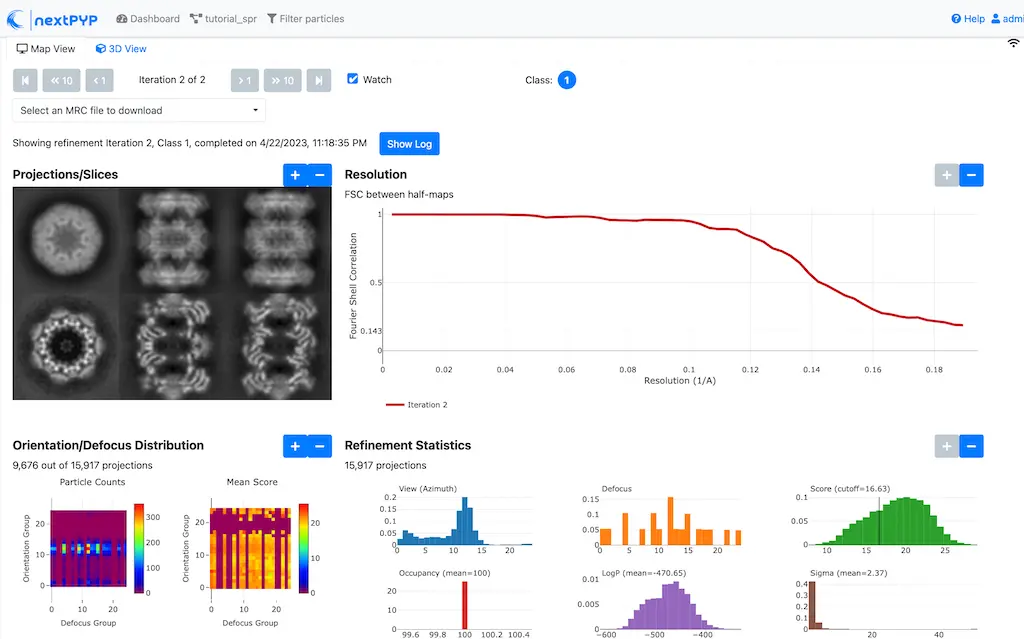
Step 6: Particle refinement
Reconstruction and additional refinement using 2x binned particles ( 9 min)
Click on
Particles(output of Particle filtering block) and select Particle refinement
Go to the Extraction tab:
Set
Box size (pixels)to 256Set
Image binningto 2Click on the Refinement tab
Select the
Initial modelby clicking on the icon and selecting the file sp-fine-refinement-*_r01_02.mrcSelect the
Input parameter fileby clicking on the icon and selecting the file sp-fine-refinement-*_r01_02_clean.par.bz2Set
Max resolution (A)to 6:4:3Check
Use signed correlationSet
Last iterationto 6Set
Search modeto local
Click Save, Run, and Start Run for 1 block to launch the job
Click inside the Particle refinement block to inspect the results:
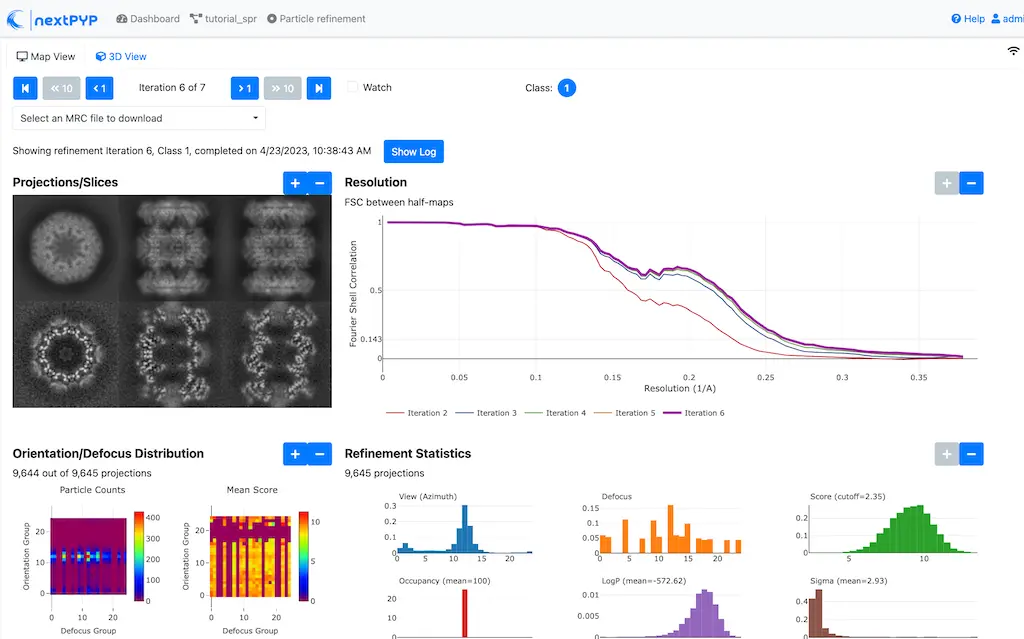
Tip
Use the navigation bar at the top left of the page to look at the results for different iterations
Step 7: Create shape mask
Use most recent reconstruction to build a shape mask ( <1 min)
Click on
Particles(output of Particle refinement block) and select MaskingEnter parameter values for the Masking tab:
Select the
Input mapby clicking on the icon and selecting the file sp-coarse-refinement-*_r01_06.mrcSet
Threshold for binarizationto 0.3
Click Save, Run, and Start Run for 1 block to launch the job
Click on the icon of the Masking block, select the Show Filesystem Location option, and Copy the location of the block in the filesystem (we will use this in the next step))
Click inside the Masking block to inspect the results of masking
Step 8: Local refinement
Additional refinement iterations using 2x binned data ( 2 min)
Go one block upstream to the Particle refinement block, click on the icon and select the Edit option from the menu
Go to the Refinement tab:
Set
Last iterationto 7Select the
Shape maskby clicking on the icon , navigating to the path of the Masking block copied above, and selecting the file frealign/maps/mask.mrc
Click Save, then Run. We now need to uncheck the box for the Masking block (since we don’t want to re-run this block), then click Start Run for 1 block
Click inside the Particle refinement block to inspect the results:
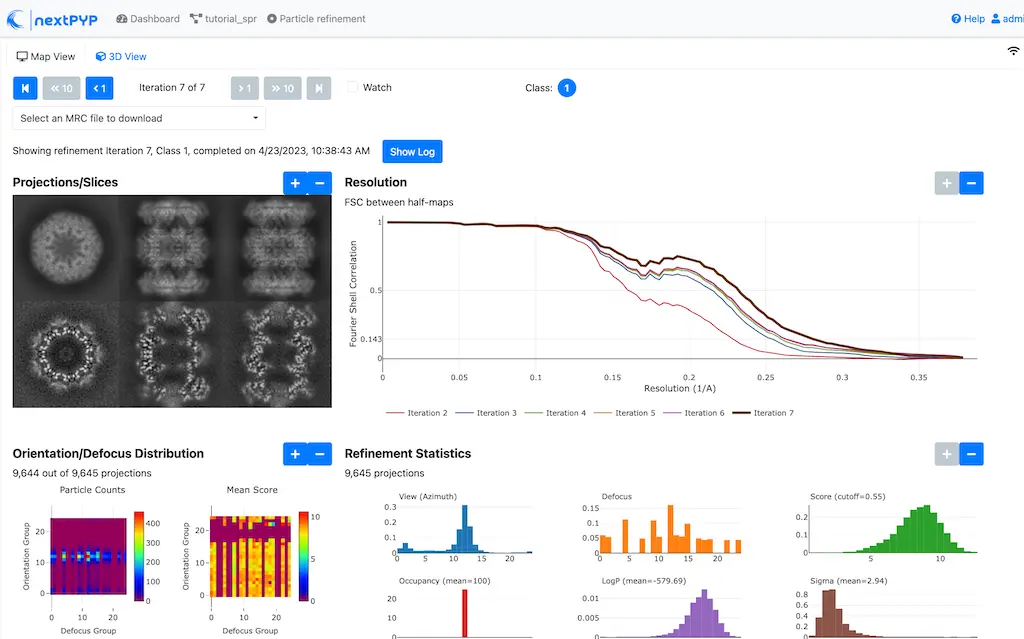
Step 9: Particle-based CTF refinement
Per-particle CTF refinement using most recent reconstruction ( 9 min)
Click on the menu icon from the Particle refinement block and choose the Edit option.
Go to the Refinement tab:
Set
Last iterationto 8Click on the Constrained refinement tab
Set
Number of regionsto 8,8Check
Refine CTF per-particle
Click Save, Run, and Start Run for 1 block
Click inside the Particle refinement block to inspect the results
Step 10: Movie frame refinement
Particle-based movie-frame alignment and data-driven exposure weighting ( 8 min)
Click
Particle set(output of Particle refinement block) and select Movie refinementGo to the Refinement tab:
Select the
Initial modelby clicking on the icon and selecting the file sp-coarse-refinement-*_r01_07.mrcSelect the
Input parameterby clicking on the icon and selecting the file sp-coarse-refinement-*_r01_07.par.bz2Set
Max resolution (A)to 3Set
Last iterationto 3Check
Skip refinementGo to the Constrained refinement tab
Set
Last exposure for refinementto 60Check
Movie frame refinementCheck
Regularize translationsSet
Spatial sigmato 15Go to the Exposure weighting tab
Check
Dose weighting
Click Save, then Run to launch Movie refinement. Uncheck the box for the Masking block and click Start Run for 1 block
Click inside the Movie refinement block to inspect the results:
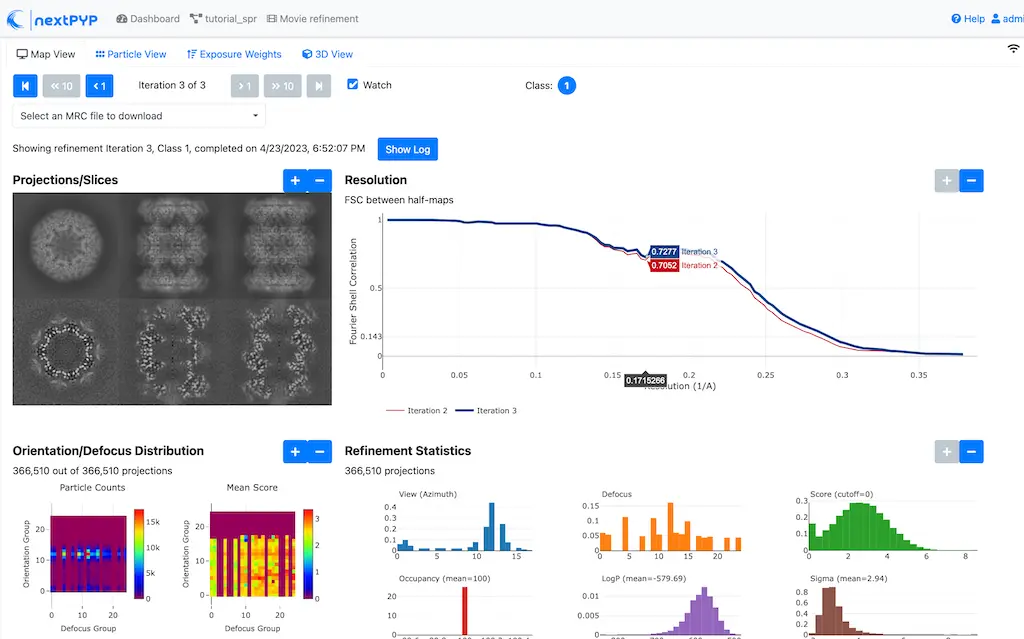
Step 11: Refinement after movie frame refinement
Additional refinement using new frame alignment parameters ( 8 min)
Click on the menu icon from the Movie refinement block and choose the Edit option.
Go to the Refinement tab:
Set
Last iterationto 4Uncheck
Skip refinementClick on the Constrained refinement tab
Uncheck
Movie frame refinement
Click Save, Run, and Start Run for 1 block
Click inside the Movie refinement block to inspect the results:

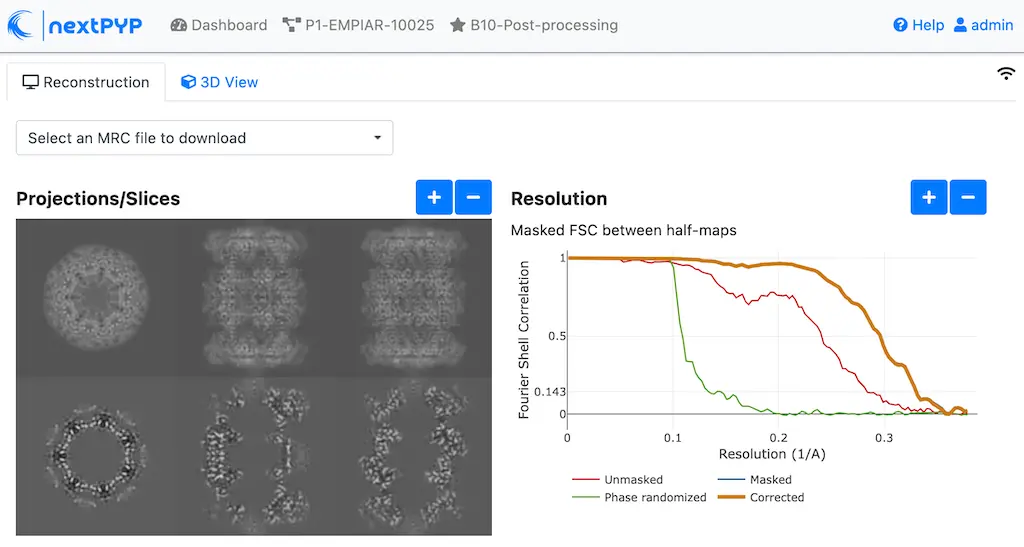
Step 12: Map sharpening
Apply B-bactor weighting in frequency space ( <1 min)
Click
Frames(output of Movie refinement block) and select Post-processingGo to the Post-processing tab:
Select the
First half mapby clicking on the icon and selecting the file sp-flexible-refinement-*_r01_half1.mrcSet
Automask thresholdto 0.5Set
Adhoc B-factor (A^2)to -50
Click Save, then Run. Uncheck the box for the Masking block and click Start Run for 1 block
Click inside the Map sharpening block to inspect the results:
Info
Running times were measured running micrographs in parallel on nodes with 124 vCPUs, 720GB RAM, and 3TB of local SSDs