Neural-network based picking
Contents
Neural-network based picking
nextPYP implements semi-supervised particle picking using neural-networks both for 2D micrographs and 3D tomograms
Step 1: Pick particles for training
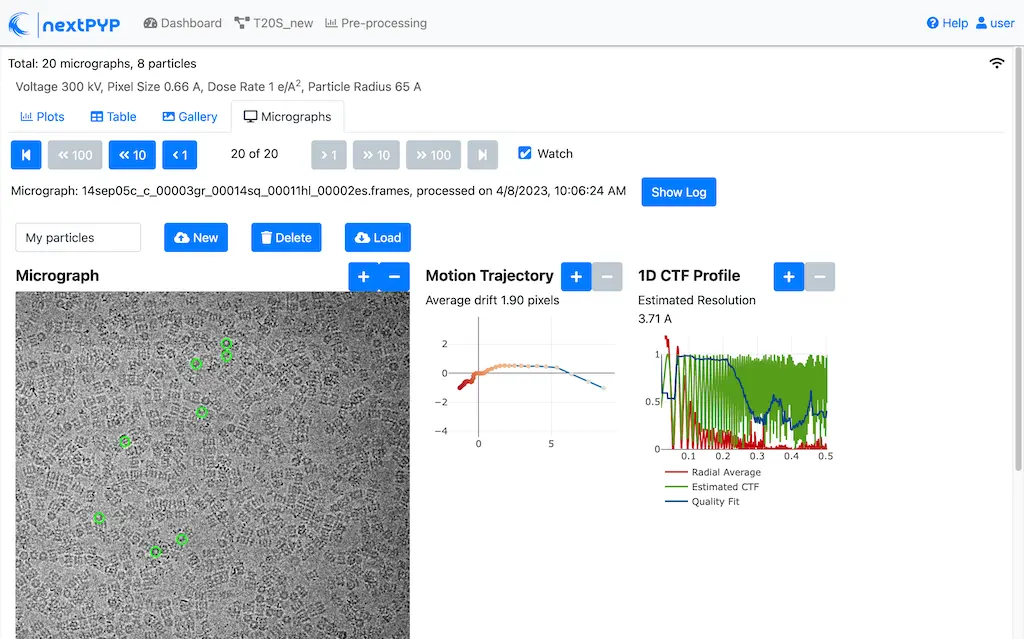
Click inside the Pre-processing block and go to the Micrographs tab
Create a new list by entering a name and clicking New
Select particles in the current micrograph by clicking on their centers
Navigate to other micrographs in the dataset and select additional particles as needed
Click inside the Pre-processing block, go to the Tilt-series tab, and select the Reconstruction group
Create a new list by entering a name and clicking New
Select particles in the current tomogram by clicking on their centers. Use the slider below the image to scroll through the tomogram
Navigate to other tomograms in the dataset and select additional positions as needed

Note
Particles can be deleted by right-clicking on the markers
Particle positions are saved automatically every time a particle is added or deleted
The total number of particles in a dataset is displayed on the top-left corner of the page
Tip
The size of the markers can be controlled by changing the Detection radius in the Particle detection tab. The block must be re-run for this change to take effect
Step 2: Train the neural-network model
Open the settings of the Pre-processing block, go to the Particle detection tab and select pyp-train as the
Detection methodChoose the list of manually selected positions from the
Select list for trainingdropdown menu at the top of the form
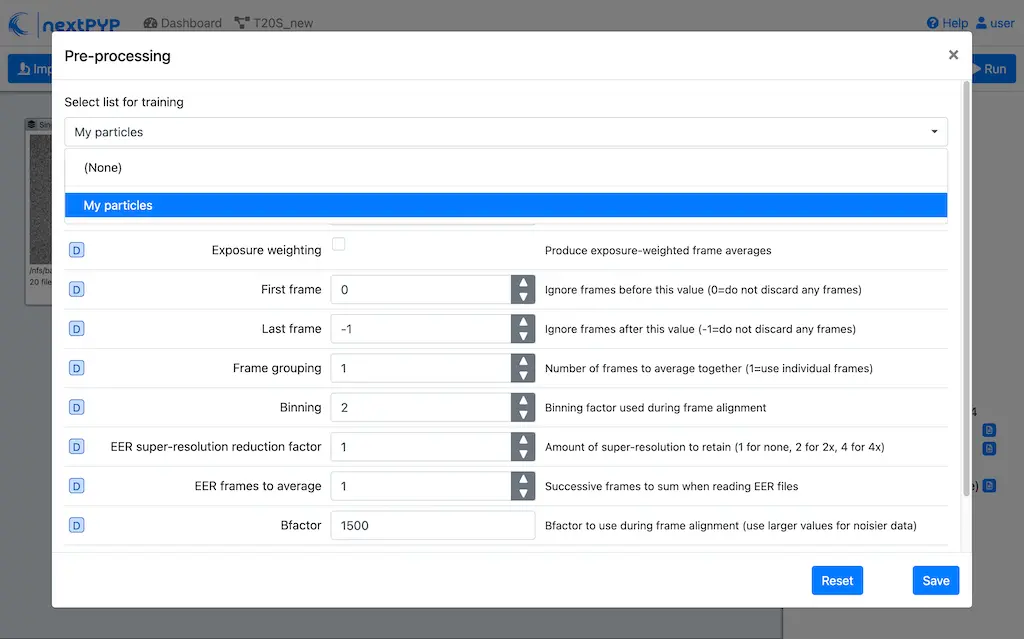
Go to the Training/Evaluation tab and set the desired parameters for training
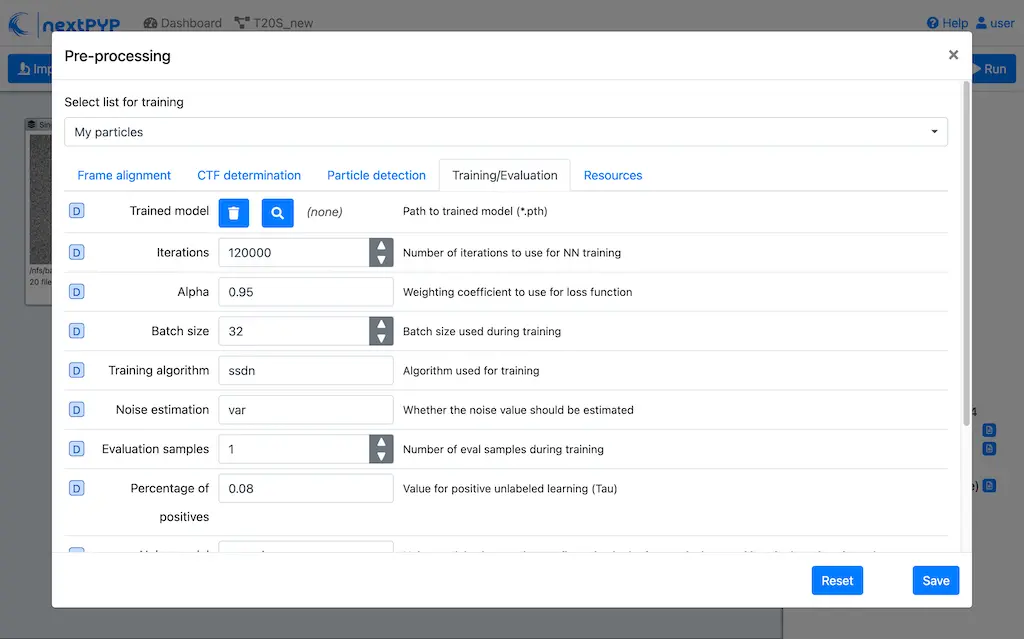
Click Save, then Run to train the model
Note
Since training is run using the GPU, a GPU partition must be configured in the nextPYP instance
Step 3: Run inference using the trained model
Go to the Particle detection tab in the Pre-processing block and select pyp-eval as the
Detection methodGo to the Training/Evaluation tab and select the location of the trained model obtained in the previous step (
train/YYYYMMDD_HHMMSS/*.trainingfor 2D, andtrain/YYYYMMDD_HHMMSS/*.pthfor 3D)Click Save, then Run to evaluate the model on all the micrographs or tomograms
Inspect the results using the Micrographs tab (2D) or the Reconstruction group in the Tilt-series tab (3D)
Tip
Since the quality of the picking may depend on the size of the training set, challenging datasets may require the use of more particles for training
Support for Topaz picking
Starting in version 0.5.4, nextPYP supports 2D particle picking using Topaz. To use Topaz, you first need to install the program on your server or compute nodes and your nextPYP instance needs to be properly configured by setting the path to the Topaz executable and to any host-specific CUDA libraries using the configuration variables
topazandcudaPaths. See the full documentation for the configuration file for details. Once this is done, simply selecttopaz-trainortopaz-evalin Steps 2 and 3 above, respectively.