Administration
You can access the administration page by clicking on your account name in the upper right corner of any page
in nextPYP, and then clicking on the “Administration” link that appears on the next page.
The “Administration” link will only appear if your nextPYP user has been granted administrative privileges.
If the link doesn’t appear for you, you may need to ask your nextPYP administrator for help.
Tip
You can also quickly get to the administration page by editing the URL in your browser’s address bar.
Change everything including and after the first / character in the URL to /#/admin.
The admin page should look something like this:

The administration page.
Once there, you can use the administration tools to manage users groups, run diagnostic tools, and inspect jobs running on the system.
Create a new group
To add a new group
Go to the Groups tab and click + Add Group
Specify a name for the group and click Save

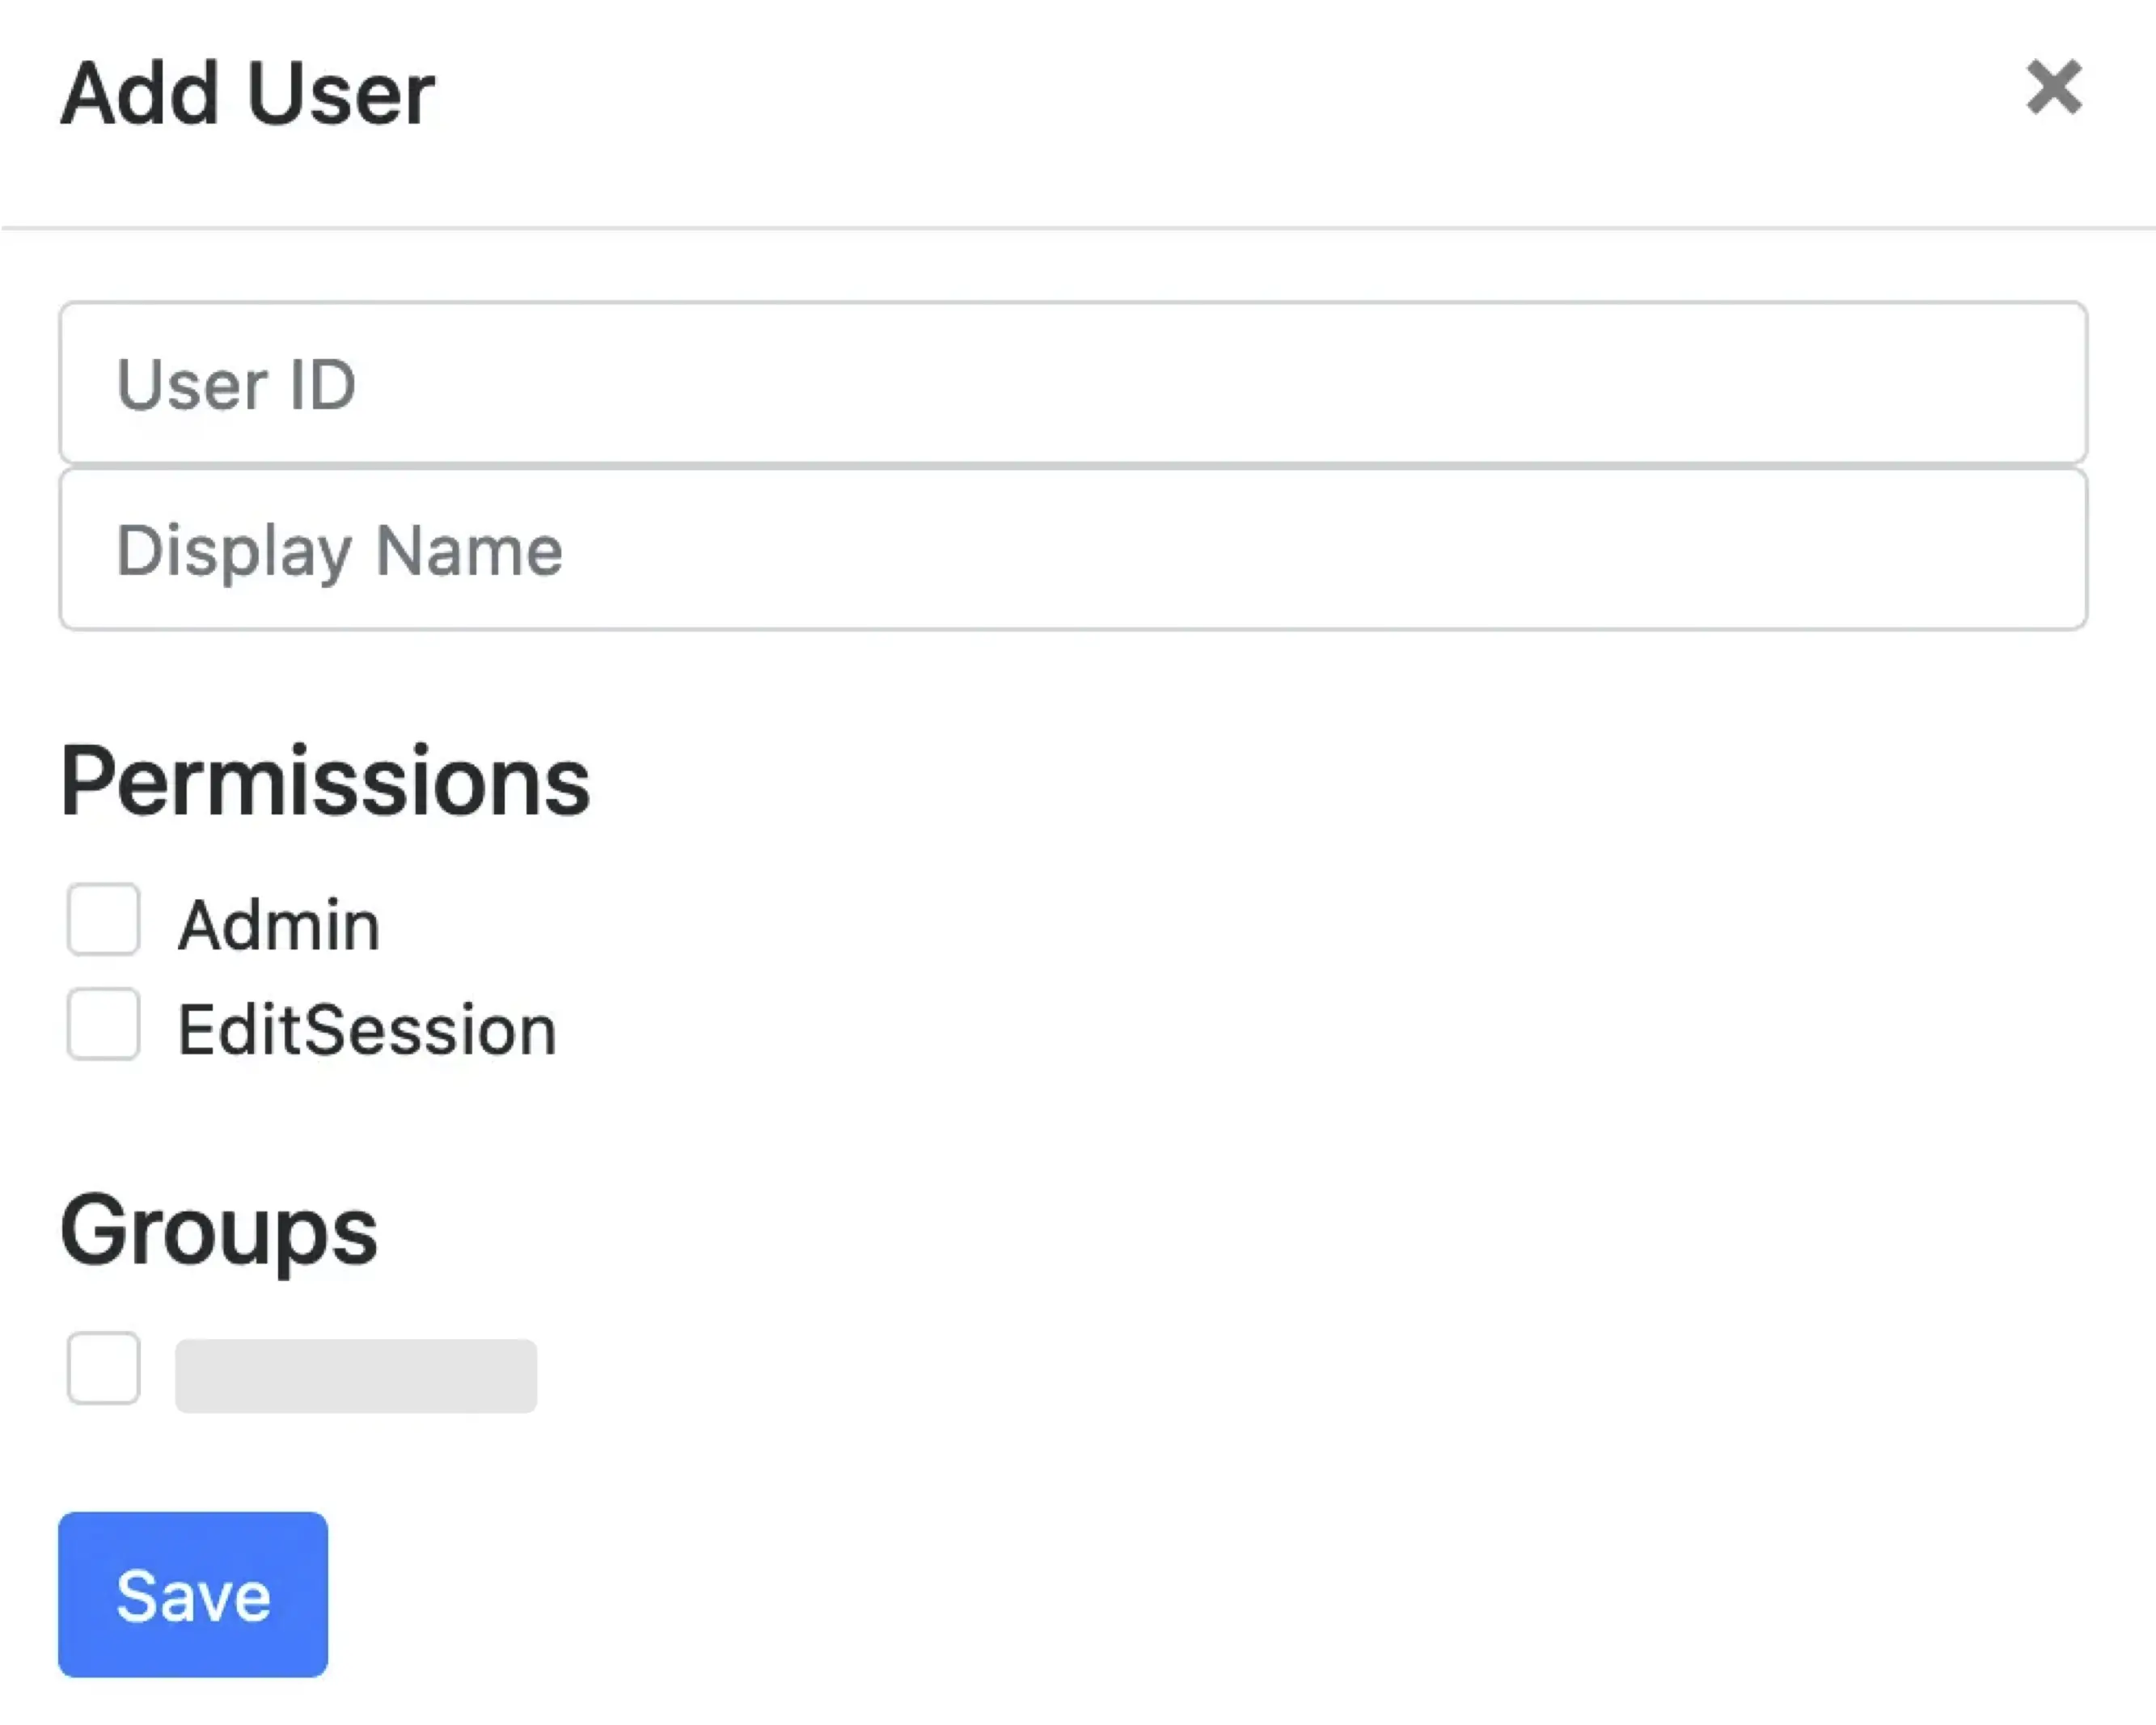
Create a new user
To add a new user
Go to the Users tab and click + Add User
Specify a User ID and Display Name
Set the necessary permissions (the EditSession attribute will allow users to launch Sessions)
Assign the user to a group(s) by checking the necessary boxes
Tips
You can also edit or delete details for Groups or Users using the and buttons
If you are using
nextPYP’s reverse-proxy for authentication, you can also create a one-time login link for new users using the button
Note
The admin page has two additional tabs which can be useful for troubleshooting installation problems. The PYP tab can be used to confirm that the website can communicate with PYP over the RPC channel, and the Jobs tab can be used to troubleshoot issues with running jobs.